Direct Answer
The start and stop pressure of a pressure switch are called cut-in pressure and cut-out pressure.
Cut-in pressure: the pressure at which the pump starts when system pressure drops.
Cut-out pressure: the pressure at which the pump stops when system pressure rises.
Boshart defines cut-in as the falling-pressure point and cut-out as the rising-pressure point. The difference between them is called the differential.
Why These Settings Matter
If the cut-in pressure is too high, the pump may start too frequently.
If the cut-in pressure is too low, the end user may experience low water pressure.
If the cut-out pressure is too high, the pump may run too long or operate close to its maximum pressure.
If the cut-out pressure is too low, the pressure tank may not store enough water and the pump may cycle more often.
A pressure switch starts or stops the pump at preset system pressures; it stops the pump at cut-out pressure and starts the pump again at cut-in pressure.
Basic Setting Rules
| Parameter | Recommendation |
|---|---|
| Cut-in pressure | High enough to maintain usable pressure |
| Cut-out pressure | Below pump and piping safety limits |
| Differential | Large enough to prevent short cycling |
| Tank precharge | Usually below cut-in pressure |
| Delay time | Helps avoid false switching from pressure spikes |
Pentair notes that many systems keep about a 20 PSI differential between cut-on and cut-off. It also states that cut-off should be at least 5 PSI below the pump dead-head pressure, while cut-on is typically 20 PSI below cut-off.
Step 1: Set the Cut-out Pressure
Cut-out pressure is the upper pressure limit where the pump stops.
Check:
- maximum pump pressure;
- pressure rating of pipes, valves, tank and instruments;
- required system pressure;
- safety valve setting;
- whether the pump can reach the target pressure safely.
The cut-out pressure should be high enough for normal use, but lower than the safe limit of the pump and system.
Step 2: Set the Cut-in Pressure
Cut-in pressure is the lower pressure point where the pump starts.
Check:
- minimum pressure required by the user;
- pressure loss in long pipelines;
- pressure tank size;
- pump start frequency;
- whether constant pressure is required.
The cut-in pressure should maintain usable water pressure and avoid frequent pump starts.
Step 3: Set the Differential
The differential is the gap between cut-in and cut-out pressure.
Examples:
| Cut-in | Cut-out | Differential |
|---|---|---|
| 30 PSI | 50 PSI | 20 PSI |
| 40 PSI | 60 PSI | 20 PSI |
| 2.0 bar | 3.5 bar | 1.5 bar |
| 3.0 bar | 5.0 bar | 2.0 bar |
If the differential is too small, the pump may short cycle. If it is too large, system pressure will fluctuate more.
Step 4: Check Tank Precharge
For systems with a pressure tank, the tank precharge must match the cut-in pressure.
When manufacturer instructions are not available, Boshart recommends setting bladder tank air pressure 2 PSI below the cut-in pressure.
Examples:
| Cut-in Pressure | Tank Precharge |
|---|---|
| 30 PSI | 28 PSI |
| 40 PSI | 38 PSI |
| 2.0 bar | about 1.85 bar |
| 3.0 bar | about 2.85 bar |
Mechanical Pressure Switch Adjustment
A mechanical pressure switch usually has two adjustment nuts:
| Adjustment | Function |
|---|---|
| Range nut | Raises or lowers both cut-in and cut-out |
| Differential nut | Changes cut-out and differential |
Adjusting the range nut changes both cut-in and cut-out while maintaining the same differential; adjusting the differential nut changes the cut-out point while the cut-in point remains the same.
Always disconnect power before adjustment and follow the manufacturer’s instructions.
Smart Pressure Switch Setting
A smart pressure switch is more suitable for pump control panels and automation systems because start pressure, stop pressure, delay and output logic can be set more clearly.
Recommended setting process:
- Confirm normal operating pressure.
- Set the stop pressure.
- Set the start pressure.
- Set hysteresis or differential.
- Add delay to avoid false switching.
- Confirm output signal compatibility.
- Test pump start and stop operation.
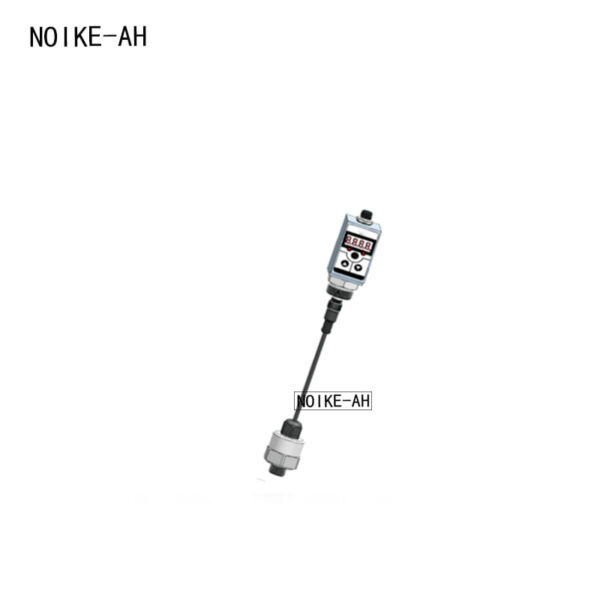
NOIKE-AH recommends NT30B Intelligent Pressure Switch for pump start/stop control, high/low pressure alarm and pump protection. For continuous pressure feedback, use NT30D Pressure Transmitter. For local pressure reading, add NT53D Digital Pressure Gauge.
Product Combination
| Application | Recommended Product | Function |
|---|---|---|
| Basic pump control | NT30B Intelligent Pressure Switch | Start/stop pressure setting |
| Control panel integration | NT30B + NT30D | Switch control + 4–20mA signal |
| Local pressure check | NT53D Digital Pressure Gauge | Actual pressure reading |
| High-reliability pump set | NT30B + NT30D + NT53D | Control, feedback and display |
Conclusion
To set pressure switch start and stop pressure correctly:
- Set the cut-out pressure first within pump and system limits.
- Set the cut-in pressure based on minimum usable pressure.
- Keep a suitable differential to avoid frequent cycling.
- Check pressure tank precharge if a tank is used.
- Test the control panel logic after adjustment.
NOIKE-AH NT30B Intelligent Pressure Switch is suitable for pump start/stop control, high/low pressure alarm and pump protection. When combined with NT30D Pressure Transmitter and NT53D Digital Pressure Gauge, it helps improve pump pressure control, system stability and maintenance efficiency.